Access Azure AD protected API with managed Identity
Managed identities are a great way to improve the security of your application. Microsoft “manages” the rotation of secrets and makes sure they cannot be extracted or used anywhere outside their platform. That is the reason I’m a big fan off Managed Identities!
You should use managed identities wherever possible. It’s possible to use managed identities for accessing (custom) api’s, an that is exactly what I’ll be explaining in this post. At the and you will be able to call any Azure AD protected api with using a managed identity.
Prerequisites
- Create an application that can utilize Managed Identities (eg. Azure Functions).
- Turn on the system assigned managed identity.
- Setup an API App Registration (or use the graph api sample below).
- Create a new App registration.
- Set the
Application ID URI, this is important for it to work. - Add at least 1 AppRole to the Application, that is for Applications (or Users and Applications).
- Assign the AppRole to the managed identity.
- Request a token using the managed identity.
- Use the token with a http client off choice.
Important note
A managed identity is linked to a resource. If you delete the resource, the managed identity and the assigned permissions are lost forever!
Assign permissions to managed identity
This script uses the AzureAD powershell module, you can install this module with Install-Module AzureAD if needed.
Collect the following information:
| What | Description | Sample Value |
|---|---|---|
| Managed identity Object ID | The ID of the service principal, copy from the portal under the Identity tab | 00000000-0000-0000-0000-000000001234 |
| API Name | The name of the Enterprise application you want to request a token for | Microsoft Graph |
| API App Role | The value of the Role you want to grant access to | User.Read.All |
Change these details in the following powershell script and execute.
# Connect to AzureAD
Connect-AzureAD
$apiApplicationName = "Microsoft Graph"
$apiApplicationRole = "User.ReadWrite.All"
$managedIdentityObjectId = "00000000-0000-0000-0000-000000001234"

# Check if service principal exists
$managedIdentitySp = Get-AzureADServicePrincipal -ObjectId $managedIdentityObjectId -ErrorAction SilentlyContinue
if($null -eq $managedIdentitySp) {
  Write-Output "Managed identity not found"
  exit 10
}

# Load the Service Principal (the ID and the roles are needed)
$apiServicePrincipal = Get-AzureADServicePrincipal -SearchString $apiApplicationName | Select-Object -first 1
if($null -eq $apiServicePrincipal) {
  Write-Output "Service principal for api not found"
  exit 20
}

# Filter the correct role, the id is needed to assign it to the managed identity
$apiRole = $apiServicePrincipal.AppRoles | Where-Object {$_.Value -eq $apiApplicationRole -and $_.AllowedMemberTypes -contains "Application"}
if($null -eq $apiRole) {
  Write-Output "Application role not found"
  exit 30
}

# Assign the role to the managed identity
New-AzureADServiceAppRoleAssignment -ObjectId $managedIdentityObjectId -PrincipalId $managedIdentityObjectId -ResourceId $apiServicePrincipal.ObjectId -Id $apiRole.Id
You can also use this script which shows you some more details on what the script is doing.
Validate the assigned permissions
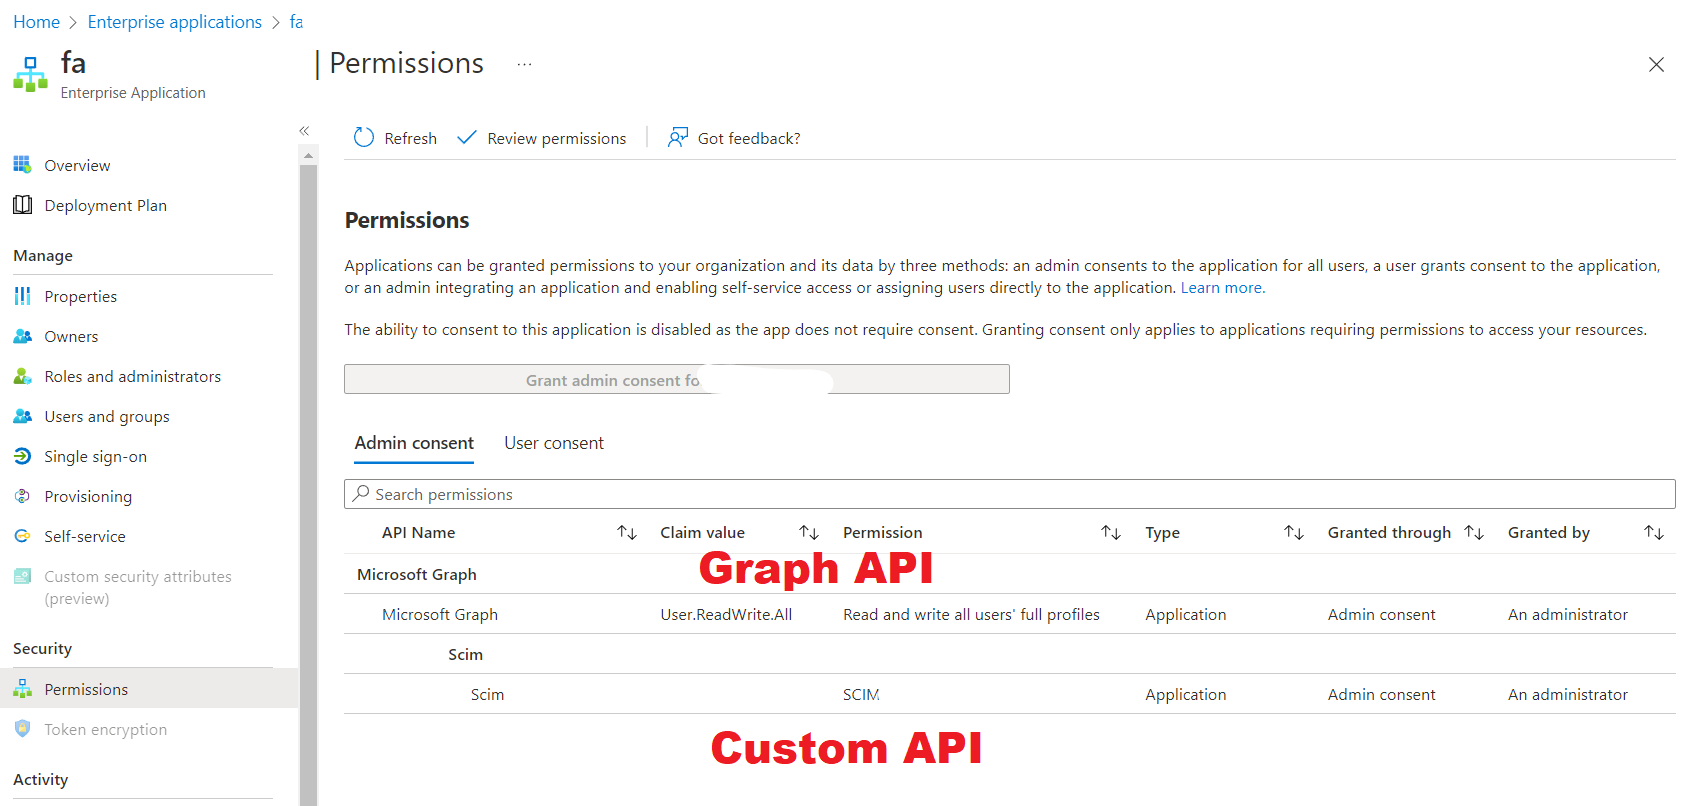
If the script is executed correctly you should now be able to see the permissions on the portal under Enterprise Applications. To see the managed identities, switch the Application Type to Managed Identities.
Find your managed identity and open the permissions panel (under security). With the script above you can assign permissions for tha build-in API’s like the Graph API or for your custom API.
Request a token for an API
All those configuration steps, and still no access token? The configuration only has to be done once. After that you can request a token in your application with the following C# code:
using Azure.Core;
using Azure.Identity;
...
// To request a token using managed identity, the scope has to be the "give me a token with all granted permissions" default. (App URI ID + .default)
var scope = "api://d60f1ae7-2192-4b6c-876c-343f558a5851/.default";
// or var scope = "https://graph.microsoft.com/.default"; for the graph api
var tokenCredential = new ManagedIdentityCredential();
var tokenResponse = await tokenCredential.GetTokenAsync(
  new TokenRequestContext(new[] { scope }),
  cancellationToken
);
// You now have a valid access token for the api in tokenResponse.Token.
Check the token
You should copy the token and paste it in jwt.ms. This page lets you inspect the token content, and explains what everything means.
Validate the token
Without assigning the correct Application Role, you’ll still get a token for that specific application, but if won’t have any roles. This is why the api that is protected with the tokens should not only validate the iss and aud claims, but also make sure the token has the expected Application Role. Tokens without the expected role(s) SHOULD ALWAYS be threated as invalid and thus result in an error. More details here
Conclusion
Once you know the steps it’s really easy to setup a managed identity to access some build-in/custom api. Since the Application ID URI is used as a scope prefix, it is important to configure that on the API App registration, without this you will not get a token!
If you would use the DefaultAzureCredential instead of the ManagedIdentityCredential, you should be able to test getting a token with some environment variables.
I think you should cache the tokens, because there is a limit in how many tokens you can requests per second. See TokenCache, but I’m not sure how that applies to the above sample. When caching tokens keep in mind that they can provide great power (for instance the Directory.ReadWrite.All scope), so you should threat access tokens as highly sensitive!